Wondering if your chipper isn't performing like it used to? Here are the top 3 signs it's time to replace your wood chipper blade-clear, no-guesswork indicators that your machine needs attention.
Key Takeaways
- Watch for poor chip quality, increased vibration, and visible blade wear-these are the top warning signs.
- Replacing wood chipper blades early avoids costly damage to the machine and maintains chip quality.
- Regular maintenance, sharpening, and inspections are essential to extend blade life and prevent downtime.

Poor Chip Quality
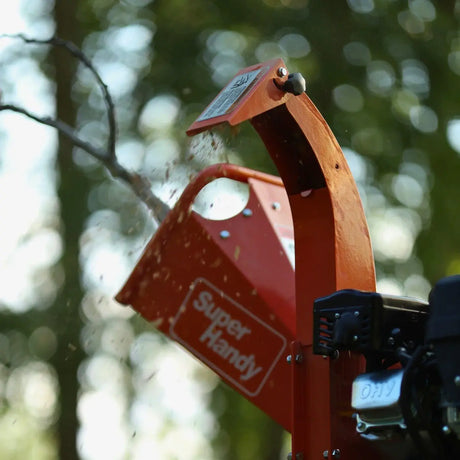
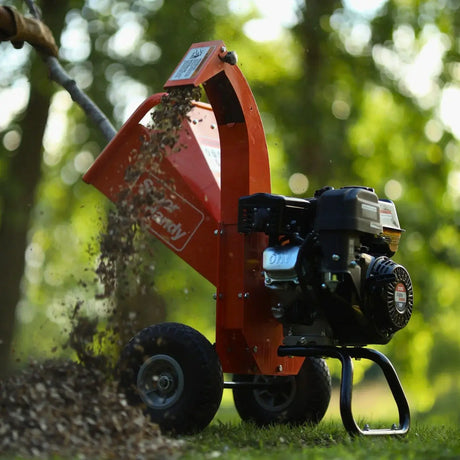
The first red flag? Poor chip quality. If your wood chipper starts producing stringy shreds or powdery debris instead of clean, uniform wood chips, your chipper blades are likely dull.
This happens when blades stop slicing cleanly and start tearing or grinding the wood. That tearing effect creates too much dust, clogs up the chute, and slows you down. It also stresses the engine, forcing it to overcompensate for what the blades can't handle anymore.
Real-life example? A customer once chipped dry brush after a long season without blade maintenance. His wood chipper blades left him with fine, stringy mess-useless for mulch and a nightmare to clean up. Fresh chipper knives fixed it in a few minutes.
If you're seeing irregular chips, that's your signal. When wood chipper blades can't deliver clean cuts, the entire machine suffers-and so do your results.

Increased Vibration During Operation
Feeling your chipper shake more than usual? That's a major sign your blades are either dull, unbalanced, or worn unevenly. Increased vibration is more than annoying-it's a risk.
Here's what happens:
- The chipper knives lose balance from uneven wear
- The machine compensates, causing internal stress
- Vibration shakes the engine, wears down the bearings, and can loosen bolts
This isn't just a performance issue-it's a safety one. A vibrating wood chipper becomes unpredictable, especially when feeding larger branches. That's why tree care professionals check for vibration before every job.
If your wood chipper vibrates excessively, check your chipper blades first. A quick inspection might reveal a knife with a damaged edge, or one that's no longer making proper contact with the anvil.
If your chipper is not operating normally, check out our chipper troubleshooting guide to resolve the problem

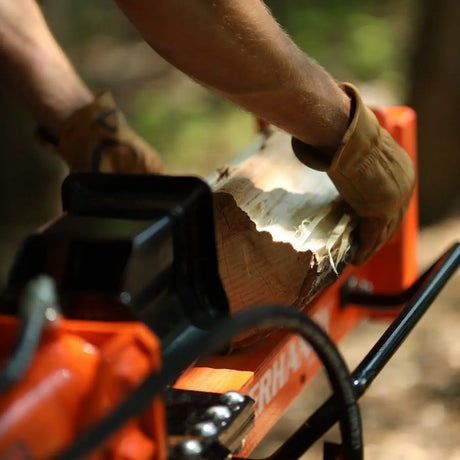
Visible Damage or Wear
Lastly, inspect your blades visually. If you see chips, cracks, bends, or serious wear, it's time to replace them. Don't wait for performance to drop-damage to the sharp side of the blade can ruin the mounting surface or damage the drum.
Things to look for:
- Deep nicks on the knife edge
- Worn-down corners
- Warped or loose blades
- Uneven cutting surfaces
If the knife is dull to the touch or shows heavy scoring, it's not doing its job-and it's putting the entire machine at risk. Tree care professionals never second-guess this: once you see physical damage, it's better to swap in new blades than risk more expensive repairs.
Bonus tip: if you've sharpened a set of chipper blades more than 4-5 times, the life of the blade might be up. Check your manual for thickness specs and minimum clearance-it could be time to replace instead of sharpen.

Tips for Maintaining Optimal Performance of Wood Chipper Blades
Your wood chipper blades are the heart of your machine's cutting power. Whether you're processing dry brush, chunky wood, or larger branches, keeping those blades sharp, secure, and ready makes all the difference. Let's go over three critical ways to keep your wood chipper running smooth and safe.
Regular Sharpening Schedule
A proper sharpening routine isn't optional-it's essential. As a general rule, sharpen your chipper knives every 50 to 100 hours of run time. If you're chipping dirty or sandy material, you may need to sharpen more often.
Here's why it matters:
- Sharp blades cut cleaner, reducing strain on the engine
- Dull chipper blades produce uneven wood chips and burn more fuel
- Regular sharpening extends the life of your blades, delaying the need to replace them
Use a jig or belt sander to maintain the correct edge angle. Always follow your machine's manual for precise sharpening specs. If you're unsure, have a pro do it-it only takes a few minutes, and the performance boost is immediate.
And remember: don't sharpen dull blades past the manufacturer's minimum thickness. Overdoing it will shorten their life and reduce safe clearance between the blade and anvil.
Proper Installation Techniques
Installing chipper blades the right way is just as important as keeping them sharp. Poor installation can lead to premature wear, vibration, or even blade failure mid-operation-not something you want on a busy job site.
Here's what to double-check during installation:
- Clean the mounting surface thoroughly
- Align the knife perfectly with the anvil
- Apply proper torque to all bolts-use a torque wrench, don't guess
- Inspect fasteners and tighten them correctly without overdoing it
Many tree care professionals overlook the clearance between blade and anvil-a small gap, typically around 0.030", ensures a clean cut without overloading the machine. Refer to the manual to get it right.
And don't forget a dab of grease on the bolt threads to prevent seizing, especially in dusty conditions. A little care here saves money and avoids unnecessary repairs down the road.
Carrying Spare Blades
Want to avoid downtime? Carry spare blades-always.
Here's the truth: you never know when your knife will chip or get stuck mid-cutting. Having an extra set of wood chipper blades on hand keeps your equipment moving, especially when you're out in the field.
This is particularly true for tree care crews handling heavy wood loads. On a recent job, a customer's blade hit a buried nail in some brush. The blade was toast, but since he had a backup set, the job was back on track in a few minutes.
A few extra blades in the truck means:
- No waiting on parts
- No pausing the job mid-day
- No excuses-just swap, tighten, and chip
Having a spare set also helps you rotate between sharp and recently sharpened chipper knives, giving each set time for proper maintenance. And let's be honest-if you're already investing in a quality wood chipper, adding spare blades is a no-brainer.
 Importance of Checking Anvil Clearance
The anvil and blade combo is like a scissor: the knife cuts against the anvil, not through it. If the clearance between them isn't just right, everything from chip size to machine wear suffers. Most tree care professionals aim for a gap around 0.030 inches, but always follow your machine's manual.
Here's why this step matters:
- Too wide? You'll get stringy wood chips and dull blades faster
- Too tight? You risk direct contact, blade cracks, or bent bolts
- Just right? Clean cuts, smooth operation, and longer blade life
Regularly checking this clearance is one of the smartest ways to preserve your wood chipper blades and get consistent results. This simple check can save you from burning fuel on inefficient cutting, reduce vibration, and prevent engine strain.
If your wood chipper suddenly starts creating too much dust or your chipper knives are wearing unevenly, the anvil gap might be the root cause. Take a few minutes to inspect. It'll pay off.
Regular Inspection and Maintenance Routine
A consistent maintenance routine keeps your wood chipper safe, reliable, and ready for work. Blades, anvil, engine, and fasteners all require attention-especially when you're running heavy wood or brush jobs.
Here's your core maintenance checklist:
1. Inspect the blades every 8-12 hours of runtime
- Look for cracks, wear, or dull edges
- Replace if you see chips or thinness beyond the spec
2. Sharpen when needed
- If chips are rough, it's time to touch up the edge
- Don't sharpen a knife that's below minimum thickness
3. Clean the chipper before and after use
- Remove stuck debris around the drum, screen, and feed chute
- Clean the mounting surface and apply grease where necessary
4. Check and change oil regularly
- Dirty oil breaks down the engine faster
- Follow the manual for change intervals and oil type
5. Tighten all bolts
- Especially those on your blades and knife clamps
- Loose hardware = danger at high RPMs
6. Fuel and air filters
- Keep them clean to protect your engine
- Replace if you notice sluggish starts or high fuel usage
Think of it this way: your wood chipper blades are an essential part of the system, but they can't work well if everything else is off. Keeping the full machine in top shape makes every cutting session faster, safer, and easier.
A proper maintenance routine doesn't just save on repairs-it keeps your crew productive and your equipment dependable. Tree care is hard work. Don't let neglect ruin your best tool.

Summary
Keeping your wood chipper in top shape starts with a sharp focus on your blades. Ignore the early signs-like poor chip quality, increased vibration, or visible damage-and you're inviting downtime, expensive repairs, and unsafe operation. Whether you're a weekend warrior or one of the many tree care professionals working long shifts on the job site, your chipper blades are the most essential part of the entire machine.
A regular maintenance routine makes all the difference:
- Sharpen every 50-100 hours, or sooner if you're tackling larger branches or hardwood.
- Check anvil clearance and tighten all bolts to spec.
- Inspect the mounting surface and always follow the manual.
If your blades are dull, producing too much dust, or causing your engine to work harder than it should-don't guess. Replace them. Swapping in new blades takes just a few minutes, but saves you money, stress, and strain on your equipment.
Carrying spare blades isn't just smart-it's a must. When a knife gets damaged mid-job, having extras means no delay, no scrambling, and no damage to your reputation.
Bottom line? Stay sharp. When your chipper knives are properly installed, well-maintained, and ready to go, your wood chips look great, your fuel usage stays efficient, and your tree care work gets done safely and fast. That's what keeps your machine, and your business, running smooth.

Frequently Asked Questions
How often should I sharpen my wood chipper blades?
Every 50 to 100 hours of use is a solid rule-but if you're chipping larger branches, dry hardwood, or dense brush, you might need to sharpen sooner. Watch your output: if the wood chips turn stringy, dusty, or rough, your blades are getting dull.
And don't wait for problems-build sharpening into your regular maintenance. A quick edge touch-up can save your engine, your fuel, and your time.
What are the common signs that my wood chipper blades need replacing?
Here are the top 3 signs it's time to replace your wood chipper blade:
- Poor chip quality - Stringy, dusty, or uneven chips
- Increased vibration - Excess movement during operation
- Visible damage - Cracks, nicks, thinning, or rounded edges
Other red flags include:
- A machine that's struggling to feed or cut
- Higher fuel use
- Louder engine noise If you've already tried sharpening and things still aren't right, don't guess-replace the blades.
How important is checking anvil clearance?
It's critical. The anvil acts as the counter-blade. If the clearance is off, you'll get poor cuts, rough chips, and faster blade wear. If it's too tight, you risk damage to your knife, bolts, or even the drum.
Always check anvil clearance when you sharpen, install, or replace a blade. Most tree care professionals treat this as non-negotiable. It's one of the simplest ways to protect your equipment and keep safety in check.
What should I do if I notice visible damage on my wood chipper blades?
Stop immediately. If you see cracks, chips, rounded edges, or wear on the sharp side, the knife is no longer safe. Using it could damage your machine or hurt someone.
Here's what to do:
- Remove the blades and inspect the mounting surface
- Check fasteners and bolts for damage
- If the blades are within spec, sharpen
- If not, replace them and tighten everything to proper torque
Never reinstall without checking clearance. That's how you keep your chipper running smooth and safe.
Why should I carry spare blades for my wood chipper?
Because downtime costs money. Carrying spare blades lets you replace a dull or damaged knife in a few minutes-right on the job site. No waiting. No rescheduling. No angry customer.
It also keeps your team productive and protects your equipment. A rushed sharpening job or running with dull blades just isn't worth the risk. For any serious tree care work, having extra chipper blades on hand is just smart business.